Using Blueprints in Petroleum Office
Blueprints are reusable Excel worksheet components that contain pre-built calculations, labels, and formulas. They save time by providing ready-made calculation templates that you can insert into any workbook.
What Are Blueprints?
A blueprint is a small, self-contained Excel template that you insert at a specific cell location. Each blueprint includes:
- Input labels and cells for entering your data
- Formulas that perform the calculation using Petroleum Office functions
- Output cells that display results
Blueprints cover various engineering disciplines including PVT correlations, decline curve analysis, material balance, and more.
Opening the Blueprint Manager
- Go to the Petroleum Office tab in the ribbon
- In the Library group, click the Blueprints button
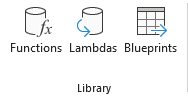
The Library pane opens at the side of the Excel window with the Blueprints tab in front. This is a task pane, not a dialog — it stays open while you work in the sheet, and it shares the pane with the Functions and Lambdas tabs, so you can switch between the three catalogs without closing anything.
Browsing Blueprints
The pane has its own toolbar row above the list:
- Tree — browse the curated hierarchy, grouped by discipline. This is the same hierarchy used by the blueprint catalog on this website
- List — browse a flat list of every blueprint instead
- Expand all / Collapse all — open or close every branch of the tree at once
- Search — type in the search box to filter by name or description
Select a blueprint and the detail panel below shows:
- Its name, category, and size in rows × columns — useful for judging how much empty space it needs
- Tags describing what it covers
- Required Functions — the Petroleum Office functions the blueprint's formulas call
The footer shows how many blueprints match the current filter, alongside the status of the blueprint source.
Inserting a Blueprint
- Click the cell in Excel where you want the blueprint to start — this becomes its top-left corner
- Select the blueprint you want in the pane
- Click Insert Blueprint
The footer shows Cell: followed by the current target address, and it tracks your Excel selection as you move around the sheet. Check it before inserting — this is the single most common source of surprise, because the blueprint lands wherever that readout points, not where you last clicked in the pane.
The blueprint inserts labels, input cells, and formulas into your worksheet. Formula references are automatically adjusted to match the insertion location. If the target location isn't suitable, a validation message explains what's wrong before anything is written to the sheet.
Working with an Inserted Blueprint
After insertion:
- Enter your input values in the designated input cells (typically highlighted or labeled)
- View results in the output cells — they update automatically as you change inputs
- Modify formulas if needed — blueprints use standard Petroleum Office functions that you can edit
Tips
- Target cell matters — the blueprint inserts relative to the target cell shown in the pane footer. Make sure there's enough empty space below and to the right; the detail panel's row × column size tells you how much
- Multiple blueprints — you can insert multiple blueprints in the same worksheet at different locations
- Formulas are editable — after insertion, blueprint formulas behave like any other Excel formula. You can modify, copy, or extend them
- Named ranges — some blueprints create named ranges for key parameters. These appear in Excel's Name Manager
- Browse before you open Excel — the full catalog is also on this website at /blueprints